Authorising a claim – Managers Only
When one of your team submits a claim form, you will be notified by email and prompted to check MyView and action the form.
You can find any forms which have been submitted within your "Authorisation" widget on the dashboard homepage.
- Expenses and Mileage will appear under the Expense Claims header
- Overtime and additional hours will appear under Irregular Claims
- Annual leave and other leave type requests will appear under Time Mgmt Absence
- The drop down arrow next to each header can be used to see the specific requests awaiting action.
- To view a summary of the claim, click on the information button found next to the claim.
Click on the employees name to open the claim form:
Overtime/Additional Hours
For overtime/additional hours claims the options available are:

- Reject to reject the claim back to the employee, who can either edit and re-submit or delete the claim.
- Authorise to authorise the claim form, this will then go directly into Resourcelink to be processed by payroll.
- Back to return to the list of pending authorisations without update.
- Use the Authorisation / Rejection Notes (not available on annual leave) to give the employee any explanation you feel necessary, especially when rejecting.
For annual leave/other leave requests there are additional steps in the authorisation process. Full details can be found at Authorising Annual Leave Requests for Employees.
Expenses and Mileage
Before approving expenses or mileage claims managers are responsible for ensuring that expenses claimed are legitimate and that the appropriate receipts have been attached electronically to all claims.
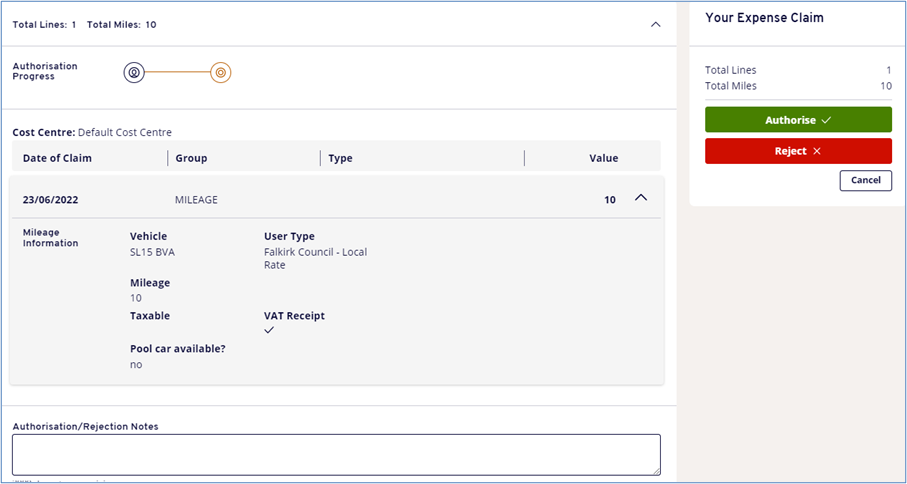
The employee expense claim contains a number of areas to be checked.

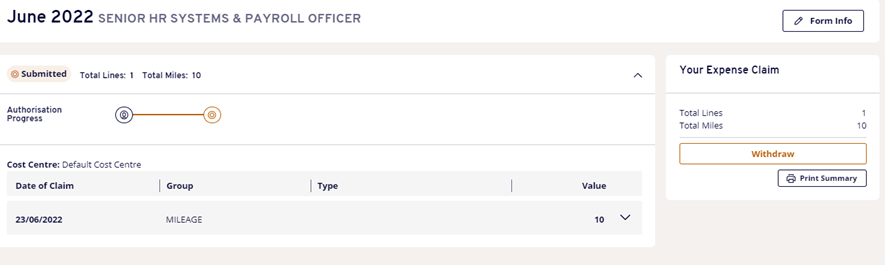
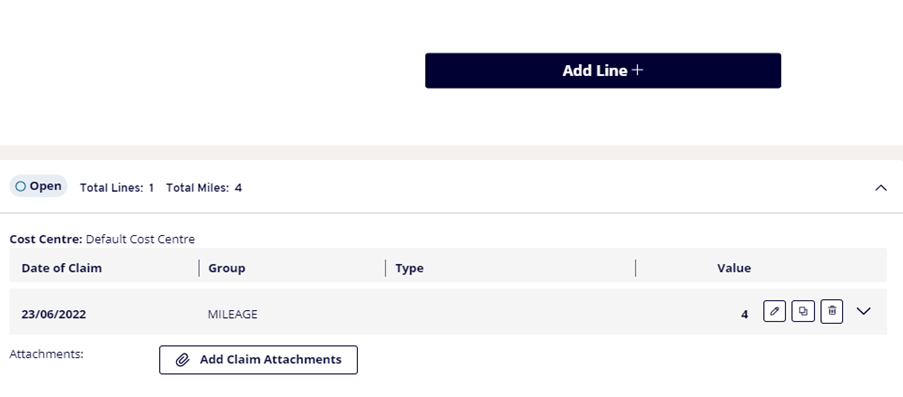
A summary of the total number of lines, and the total miles claimed will appear at the top of the claim.
[MISSING IMAGE - Claim Short Summary Screen]
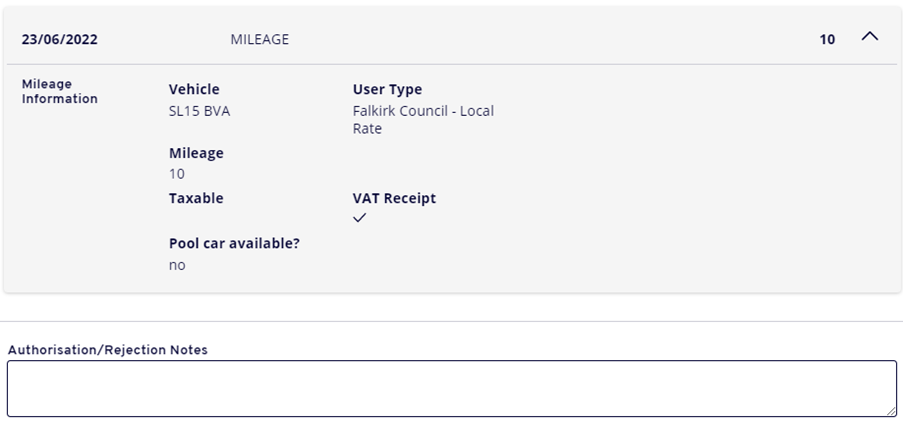
The detail of each line on the claim can be seen by clicking on the [MISSING IMAGE - DOWN ARROW] button.
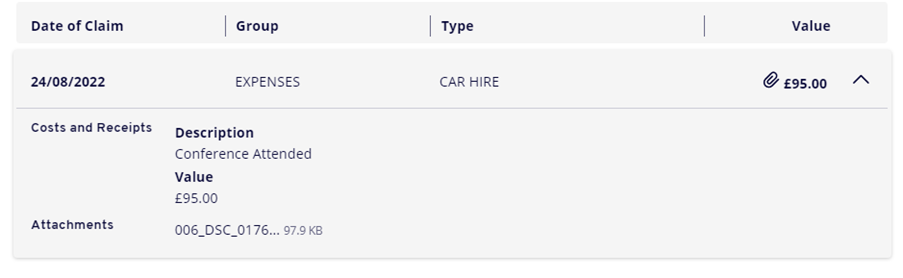
The description field will appear and this can be checked to ensure it is appropriate.
Any receipts attached to the claim need to be checked to ensure they are accurate.
- For expense claims the receipt should be attached to each individual line.
- For mileage claims the receipt can be attached to the main claim. There is no requirement to attach a petrol receipt to each individual mileage line as this could result in duplication of receipts. The only requirement is that where relevant a VAT receipt is attached which covers the cost of the petrol being reimbursed.
Extra guidance can be found on VAT receipts for mileage claims.
When a receipt has been attached to a claim line the paper clip icon will appear next to the claim line.

The receipt can be accessed within the detail of the line:
- To view the receipt click on the text of the receipt name, a message will appear asking if you want to open, save or cancel. There is no need to save the receipt; the open option should be used to view the receipt.
- The scanned image of the receipt will appear and can be checked accordingly.
- When a receipt(s) have been attached to the main claim and not an individual line they will appear in the attachments section at the end of the claim form.
Authorising/Rejecting a whole claim
If you are satisfied that the claim is accurate and wish to authorise the whole claim for payment the Authorise All button can be used, otherwise use the reject button. The Authorisation/Rejection Notes field can be used to provide more details if necessary.
When the claim is authorised or rejected, the employee will receive an email to confirm this has happened.
If you want to reject a whole claim the Reject All button should be used.
Any authorised claims will be paid in the next pay cycle.
Partial claim authorisation
The expenses and mileage module allows managers to partially authorise a claim form rather than having to reject the whole claim if there is an issue with an individual line(s).
If a claim form has been partially authorised it will have a status of mixed.
To authorise/reject particular lines the green tick or red cross buttons next to each line should be used.
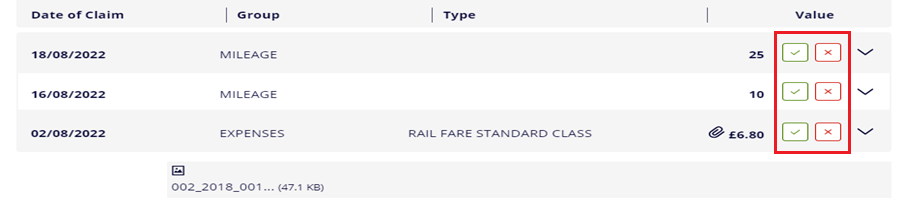
Click the green tick or red cross to accept or reject each line.
The Authorisation Notes and Rejection Notes fields will appear and notes should be added explaining why the particular lines have been authorised or rejected.
When you are happy with the details completed click on Submit.
The line(s) which has been authorised will be processed for payment and the rejected line(s) will go back to the employee for further action.
Financial Regulations for Claim Forms
Please ensure any claims you authorise meet the criteria specified in Falkirk Council's/ Falkirk Community Trust's Financial Regulations:
16.4 The certifying Officer must be satisfied that:
- forms and claims have been completed fully, accurately, and in line with all relevant guidance;
- claims are valid;
- claims are not excessive or anomalous;
- in the case of expense claims, journeys were necessary and authorised, expenses were properly and necessarily incurred, and allowances were properly due;
- evidence of expenditure, such as petrol VAT receipts, is provided where appropriate;
- in the case of overtime claims, the Officer was authorised in advance to work the additional hours, and the claimed hours were actually worked.
16.5 Each Chief Officer must keep records to support claims for payment and provide information in a format agreed with the Chief Finance Officer. Each Chief Officer is responsible for the accuracy and authenticity of such information.
Access My Claims
To Access My Claims from your Dashboard homepage:
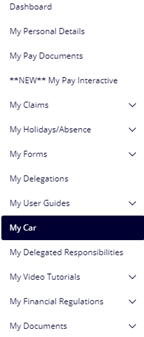
- Click on My Claims, then Create Mileage / Expenses Claim found in the left-hand navigation panel
- Before you start to complete your claim please ensure you have scanned the relevant receipts and saved them as a PDF. You should save the receipts in an appropriate location to enable you to locate them and attach to the claim.
- The create expense claim screen will appear. The position field will default to your current post.
- Employees with multiple posts should take care to ensure the correct post is selected when creating a new mileage/expense claim.
We have guidance available for each type of claim:
Expenses claims
To complete an expenses claim form, from your Dashboard homepage left hand side menu:
- Click on My Claims, then Create Mileage / Expenses Claim found in the left-hand navigation panel
- Before you start to complete your claim please ensure you have scanned the relevant receipts and saved them as a PDF. You should save the receipts in an appropriate location to enable you to locate them and attach to the claim.
- The create expense claim screen will appear. The position field will default to your current post.
- Employees with multiple posts should take care to ensure the correct post is selected when creating a new mileage/expense claim.
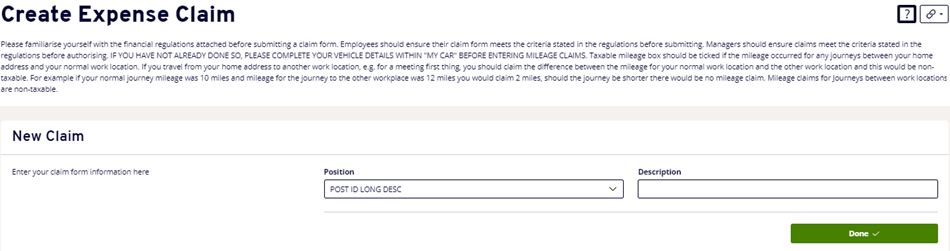
- In the description field enter the month and year relevant to the claim ie June 2022.
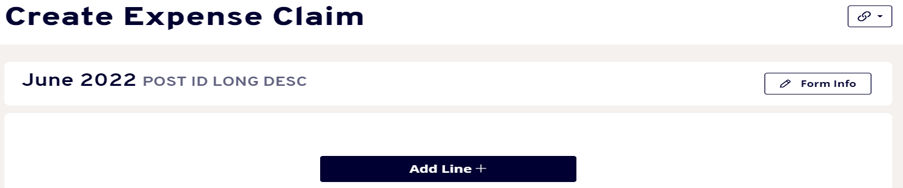
- Click Done to close the claim header and to continue to the main part of the form. The claim form header can be re-opened if you need to adjust the contents. To do this click on the Form Info button found in the top left-hand corner of the form.

- The blue Add Line + button will appear. This can be used to add as many expenses lines to the claim as necessary.
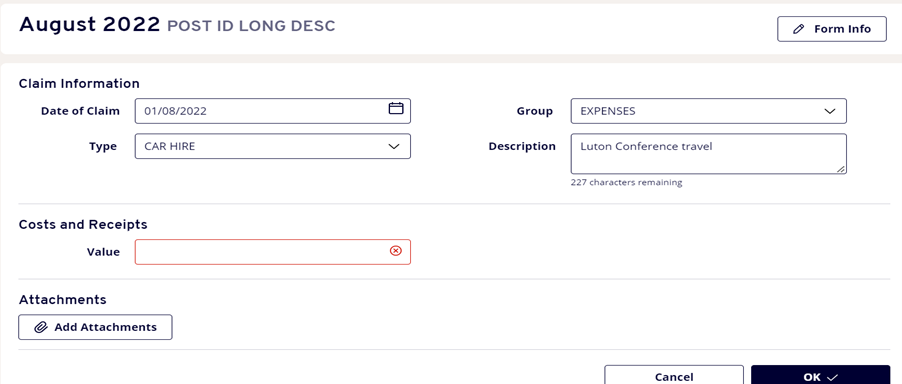
- The claim line should be completed with the relevant information:
- Date of Claim – date of journey or date expense occurred
- Group – select expenses from the drop down as relevant
- Select the type of expenses to be claimed from the drop-down list
- Enter a description of the expense eg train fare, hotel etc.
(when entering Subsistence, enter Start Time – End Time, use the format of 4 digits and 24hr clock, eg 0900 – 1600).
When the type has been selected, the cost field and receipt attachment button will appear:
- Enter the Value of the expense in pounds and pence
- Click on the Add attachments button to add in the receipt for the expense
The file explorer window will open and you can browse to where you have your receipt saved.
- When you have located the receipt click on Open
- The receipt will now be uploaded onto the claim form.
- Click on the blue OK button. You will now be presented with a summary of the open claim.

- Click Add Line + to continue recording your claim details or click on Save for Later to save your form so it can be amended further before submission.
- If you are happy that your claim is complete click on Submit to submit the form for authorisation
- When submitting a claim a box will appear to check you wish to proceed. Click on Yes submit.
- The status of the form will now have changed to submitted.
Employees: When you receive notification that your claim has been authorised, you can destroy paper receipts.
Managers: You are responsible for ensuring receipts are provided and accurate before authorising a claim in line with the financial regulations.
The scanned expense receipts will be automatically archived annually by ICT and retained for Current Year +6 as per Falkirk Council's Retention Schedule.
Mileage claims
To complete a mileage claim form, from your Dashboard homepage left hand side menu:
- Click on My Claims, then Create Mileage / Expenses Claim found in the left-hand navigation panel
- Before you start to complete your claim please ensure you have scanned the relevant receipts and saved them as a PDF. You should save the receipts in an appropriate location to enable you to locate them and attach to the claim.
- The create expense claim screen will appear. The position field will default to your current post.
- Employees with multiple posts should take care to ensure the correct post is selected when creating a new mileage claim.
In the description field enter the month and year relevant to the claim ie June 2022.
Click Done to close the claim header and to continue to the main part of the form.
The claim form header can be re-opened if you need to adjust the contents. To do this click on the Form Info button found in the top left-hand corner of the form.
- The blue Add Line + button will appear. This can be used to add as many mileage lines to the claim as necessary.
- The claim line should be completed with the relevant information:
- Date of Claim – date of journey or date expense occurred
- Group – select mileage from the drop down as relevant
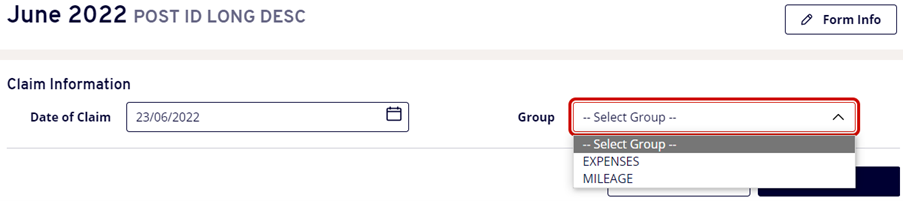
Different options will be presented depending on whether Expenses or Mileage is selected.

| Form field |
What information to provide |
| Description: |
Enter details of the journey and reason, eg Falkirk - Denny, return trip for meeting. Please use abbreviations where possible to keep descriptions short. |
| Mileage: |
Enter number of miles travelled |
| Vehicle: |
Your car registration will appear here once you have entered your details within My Car (user guide on entering vehicle details) |
| User Type: |
Select Falkirk Council - Local Rate or Cycle |
| VAT receipt: |
Mandatory - please tick to verify you have provided a receipt for your claim. The receipt can now be uploaded directly into the claim form. |
| Taxable: |
Tick if appropriate to your journey (refer to policy if unsure) |
It is a requirement of the rules of reimbursement that you obtain a VAT receipt to cover the cost of the petrol you are being reimbursed for when making a mileage claim. Further details on this can be found at VAT receipts for mileage.
When you are happy that the line has been completed fully click the blue OK button.
-
The first line of the mileage claim can be seen on the screen. You can continue to use the blue "Add Line +" button to add more lines of mileage as necessary.
-
The MyView system has been enhanced to enable users to attach a receipt directly to the claim.
-
For mileage claims the receipt can be attached to the main claim. There is no requirement to attach a petrol receipt to each individual mileage line. The only requirement is that where relevant a VAT receipt is attached which covers the cost of the petrol being reimbursed. Receipts should be scanned and saved as PDF as they were previously but now they can be uploaded directly into MyView.
-
The system will be enhanced at a future date to allow photographs of receipts to be uploaded.
-
To attach a petrol receipt to the claim click on the Add Claim Attachments button
The file explorer window will open and you can browse to where you have your receipt saved.
- When you have located the receipt click on Open
- The receipt will now be uploaded onto the claim form
- Click on the blue OK button. You will now be presented with a summary of the open claim.
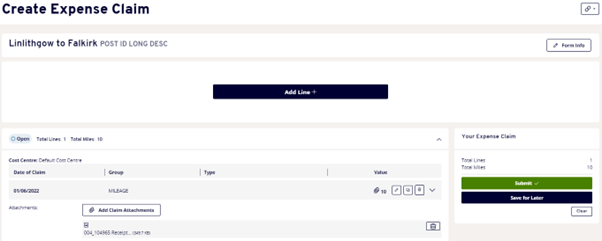
- Click Add Line + to continue recording your claim details or click on Save for Later to save your form so it can be amended further before submission.
- If you are happy that your claim is complete click on Submit to submit the form for authorisation
- When submitting a claim a box will appear to check you wish to proceed. Click on Yes submit.
- The status of the form will now have changed to submitted.
VAT receipts for mileage
It is a requirement of the rules of reimbursement that you obtain a VAT receipt to cover the cost of the petrol you are being reimbursed for.
The calculation of the VAT element is complicated so is not detailed here, however please use the table below as a guideline for receipt amount required per mileage.
For example, for each 100 miles you travel and claim for, you should have a VAT petrol receipt to the value of £9.00 petrol (this includes £1.50 VAT).
| Number of Miles |
Amount needed for petrol receipt |
Amount of petrol receipt which is VAT |
| 100 |
£9.00 |
£1.50 |
| 150 |
£13.50 |
£2.25 |
| 200 |
£18.00 |
£3.00 |
| 250 |
£22.50 |
£3.75 |
| 300 |
£27.00 |
£4.50 |
| 350 |
£31.50 |
£5.25 |
| 400 |
£36.00 |
£6.00 |
| 450 |
£40.50 |
£6.75 |
| 500 |
£45.00 |
£7.50 |
If you require further detail, please refer to the Travel and Subsistence Policy on the intranet or on your MyView Dashboard.
Add a vehicle to use for mileage claims
Please ensure you add your vehicle to the system before trying to claim mileage, as this will allow you to select your car on the mileage claim form.
In your MyView Dashboard, click on My Car.
The screen below will appear listing any vehicles you have previously had on your record. Any vehicles which do not have an end date will be available on the vehicle drop down list.

If you no longer wish to use a vehicle, click close to add an end date.

Adding a new vehicle
Click Add new vehicle.

The screen below will appear:

Enter your registration number and click Next, the screen below will appear:
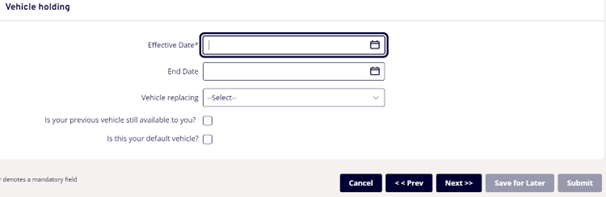
Enter the details of your vehicle, any fields marked * are mandatory.
| Field |
Explanation |
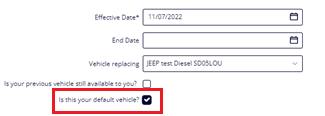
| Effective Date * |
Type or select from calendar date you would like this vehicle to become effective, ie when you'd like it available to use for mileage claims. |
| End Date |
Only use this field if you know when you will stop using this vehicle, otherwise leave blank. |
| Vehicle Replacing |
Pick from list of previous vehicles if this is replacing a vehicle. |
| Is your previous vehicle still available to you? |
Tick this box if you wish to keep your previous vehicle available to you, ie you’d like two or more cars to be available for claims, otherwise leave this box empty – the system will then put an end date on your previous vehicle making it unavailable. |
| Is this your default vehicle? |
Tick this box if you would like to make this your default vehicle. Please note that this will remove the default from any other available vehicle you may have set as a default currently. |
Enter your information and click Next, the screen below will appear:
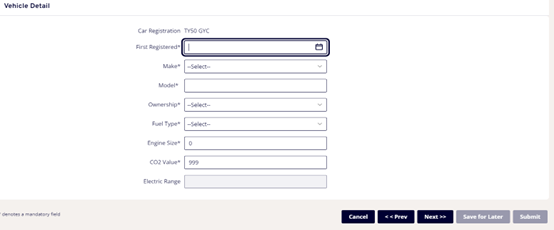
Enter the details of your vehicle, any fields marked * are mandatory. The details of your car can be found in your vehicle logbook (V5C).
| Field |
Explanation |
| First Registered * |
Type or select from calendar the date your car was first registered. |
| Make * |
Select the make of your car from the dropdown list, if it does not appear on the list please email MyView-selfservice@falkirk.gov.uk. |
| Model * |
Type the model of your car. |
| Ownership * |
Select Privately owned car or Company owned car from dropdown list. |
| Fuel Type * |
Select fuel type from dropdown list, eg petrol / diesel. |
| Engine Size * |
Enter engine size, use format 1400 not 1.4 (this is required for VAT recovery). |
| CO2 Value * |
Type CO2 Value for your car (this is used for calculating carbon emissions). |
Click Next, the screen below will appear:
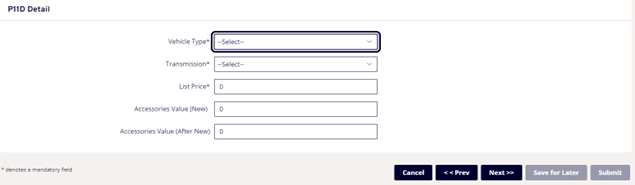
Enter the details of your vehicle, any fields marked * are mandatory.
| Field |
Explanation |
| Vehicle Type * |
Select the type of vehicle from dropdown list, eg car, van etc. |
| Transmission * |
Select Manual or Automatic from the dropdown list. |
| List Price * |
Enter list price for car. |
| Accessories Value |
Enter Accessories Value for new and after new |
If you select Privately owned, the following boxes are not required and can be filled with a 0 to allow you to proceed.
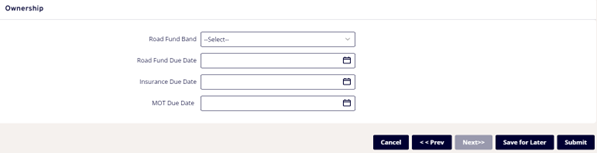
Enter the details of your vehicle, please note that the fields on this screen are not mandatory:
| Field |
Explanation |
| Road Fund Band |
Select appropriate band based on your Fuel and CO2 Type. |
| Road Fund Due Date |
Type or select from calendar date when your TAX will be due. |
| Insurance Due Date |
Type or select from calendar date when your insurance will be due. |
| MOT Due Date |
Type or select from calendar date when your MOT will be due. |
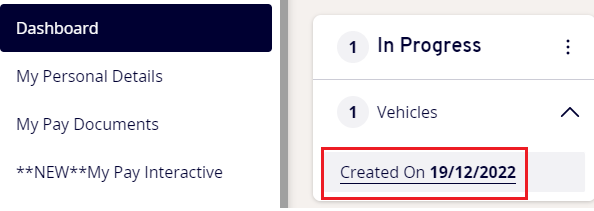
Click Save for later to save this form and return to it at a later date (please note this does NOT submit your vehicle details). The saved form can then be re-opened, by accessing it on your In Progress widget on your Dashboard homepage. You can view this by clicking on the Created on text, see below:
Click on this to re-open the form, you can then make further changes if necessary and when you are fully complete, click on Submit.
This will then appear within My Car as one of your listed vehicles and will appear on the vehicle drop down within a mileage claim form.

To change a default vehicle
Simply click set as default on the vehicle you wish to change to your default. This will then automatically appear on your mileage claim form in the vehicle field, however if you have more than one available vehicle, you can choose another vehicle using the dropdown list on the mileage the claim form.
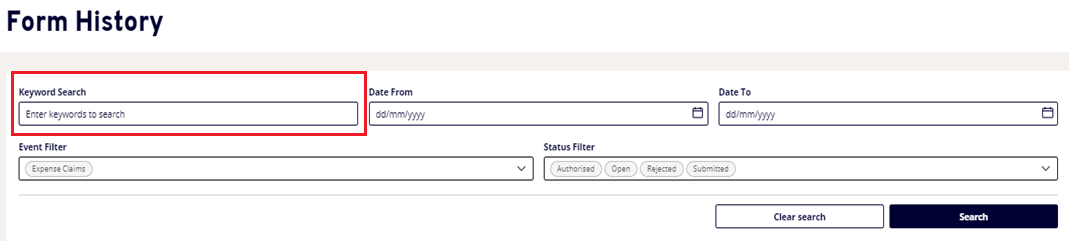
Viewing mileage/expenses claim history
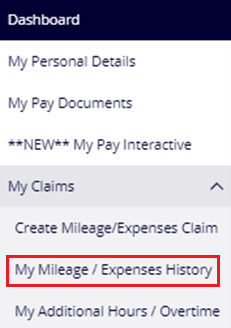
Click on My Claims, then My Mileage/Expenses History found in the left hand navigation panel.
The Form History page will be displayed. You can view the authorisation progress of your request as well as being able to view details of previously authorised/rejected forms. This includes audit details of who authorised/rejected your form and when this took place.
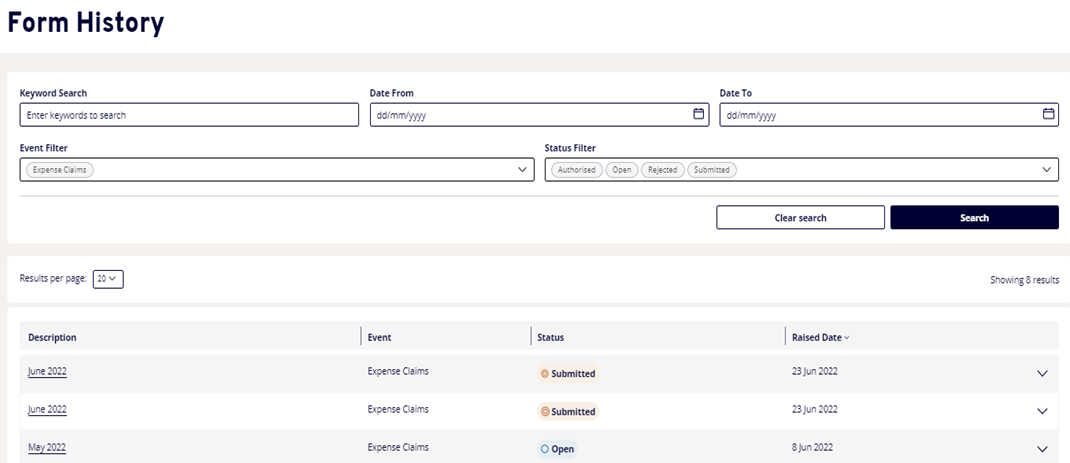
There is a search section available at the top of the page. This can be used to filter the list of expenses and mileage forms by date, status etc.
If no information is entered in the search fields all forms submitted on MyView will be displayed.
Click on the form name under Description to open the form.

The details of the claim will appear.
In the top left hand corner is a section called Authorisation Progress. The status will be green if authorised and orange if submitted and waiting action.
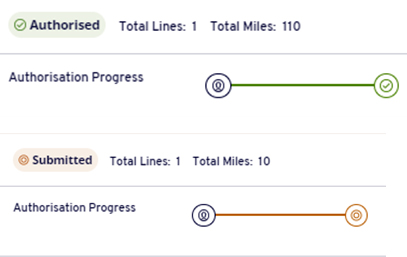
Click on the green/orange round button to view the authorisation status details.
If the form has been authorised/rejected, details will appear to show who was the authoriser and the date and time it was authorised/rejected.
If the form is pending authorisation the status will show which manager the form is sitting with for action.
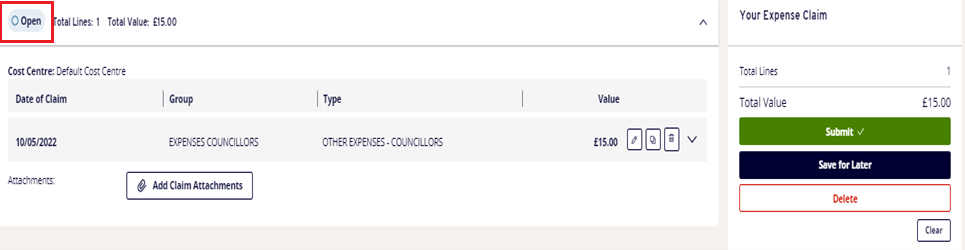
Saved forms will have a status of Open.
A saved form can be accessed and amended as many times as necessary before being submitted.
Irregular claims
To claim additional hours and overtime
The Irregular Claims module can be used by employees to claim payments for work approved in advance eg Overtime, Additional Hours, Standby and Call-outs.
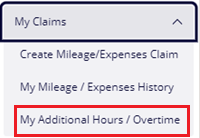
On your Dashboard homepage, click on My Claims, then My Additional Hours / Overtime at the left-hand side of your home screen.
This page shows any claim forms you have submitted (see below example). This page will also show any forms that have been rejected.

Existing claims will be listed here - the date the form has been submitted, the form number and it's description ie month entered and the total value of the claim.
Click on Create New Claim, the following form will appear:
Depending on your requirements, your form may vary from the form below (some employees may not require standby / call outs).

If you have more than one post, you will be able to select the appropriate post from this drop down.
Overtime
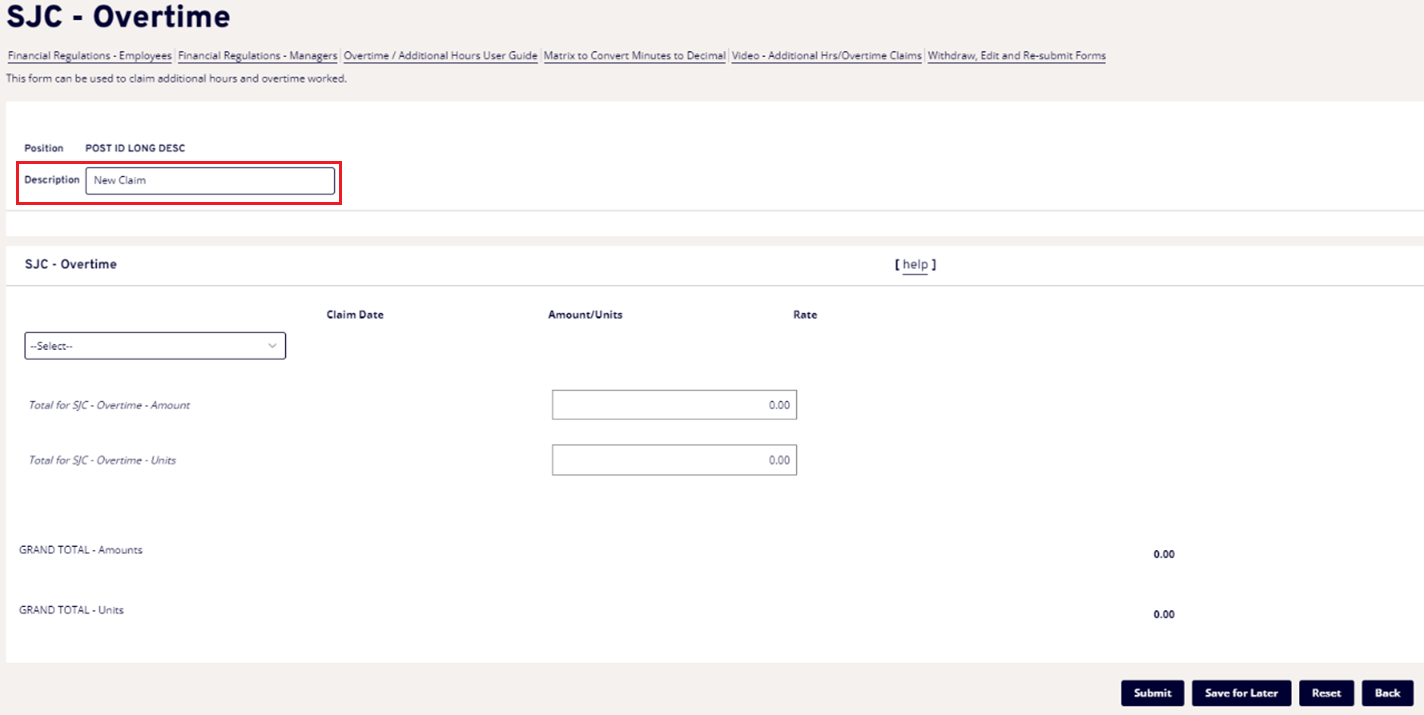
Your job title should appear automatically.
Enter description to show period covered.
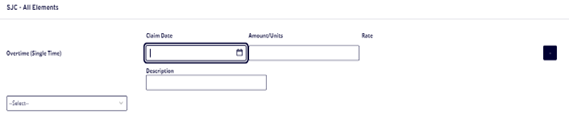
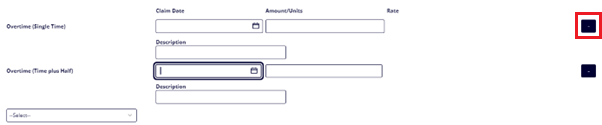
Within the Overtime part of the form, select type of overtime from the dropdown.
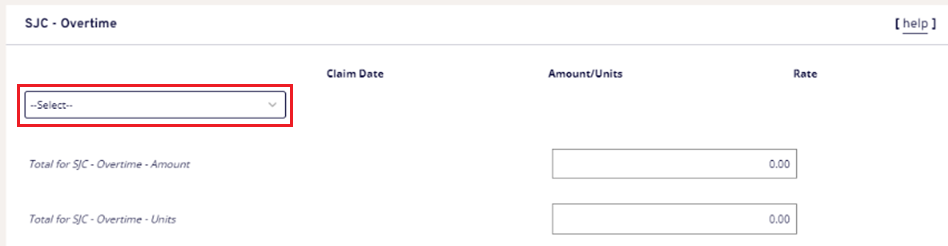
The form will then expand with new fields to allow details of the claim to be added, enter details:
| Field |
Explanation |
| Claim Date |
Date overtime worked |
| Amount/Units |
Number of hours worked |
| Description |
Enter time worked and reason. Enter time as 4 digits, 24hr clock, eg 0900-1600 covering absence |
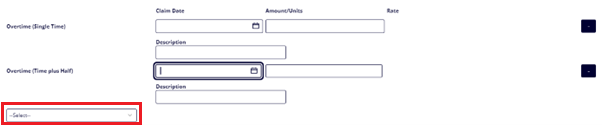
The same form can be used to accumulate more claims, simply add new claims using the dropdown list, eg see below:
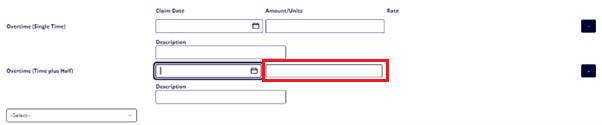
Units will automatically update, however amount will be calculated once authorised form goes into the system.
Click the blue square button to delete an entry.
Standby

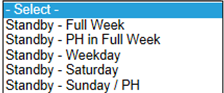
Select type of standby from the Additional Claim dropdown.
The form will then expand with new fields to allow detail of claim to be added:
| Field |
Explanation |
| Claim Date |
Date standby was worked |
| Amount/Units |
Number of units worked (based on standby type) |
| Standby type |
What to enter |
| Standby – Full Week |
enter whether this week was a full or half week (0.5 or 1) |
| Standby – Weekday |
enter whether this weekday was a full day or half day (0.5 or 1) |
If you work more than one full week or weekday, these will need to be entered as separate entries.
Units will automatically update, however the amount will be calculated once the authorised form goes into the system.

Click the blue minus button to delete an entry.
The same form can be used to accumulate more claims, simply add new claims using the drop down list.
Please refer to the Saving and Submitting Claim Forms section for further instructions.
Call Outs
Select type of Call Out from the Additional Claim dropdown.
The form will then expand with new fields to allow detail of claim to be added, enter details:
| Field |
Explanation |
| Claim Date |
Date Call Out was worked |
| Amount/Units |
Number of call outs (based on call out type) |
| Call Out type |
What to enter |
| Call Out – On Standby |
enter how many call outs within date whilst on standby |
| Call Out – No Standby |
enter how many call outs within date when not on standby |
The same form can be used to accumulate more claims, simply add new claims using the drop down list:
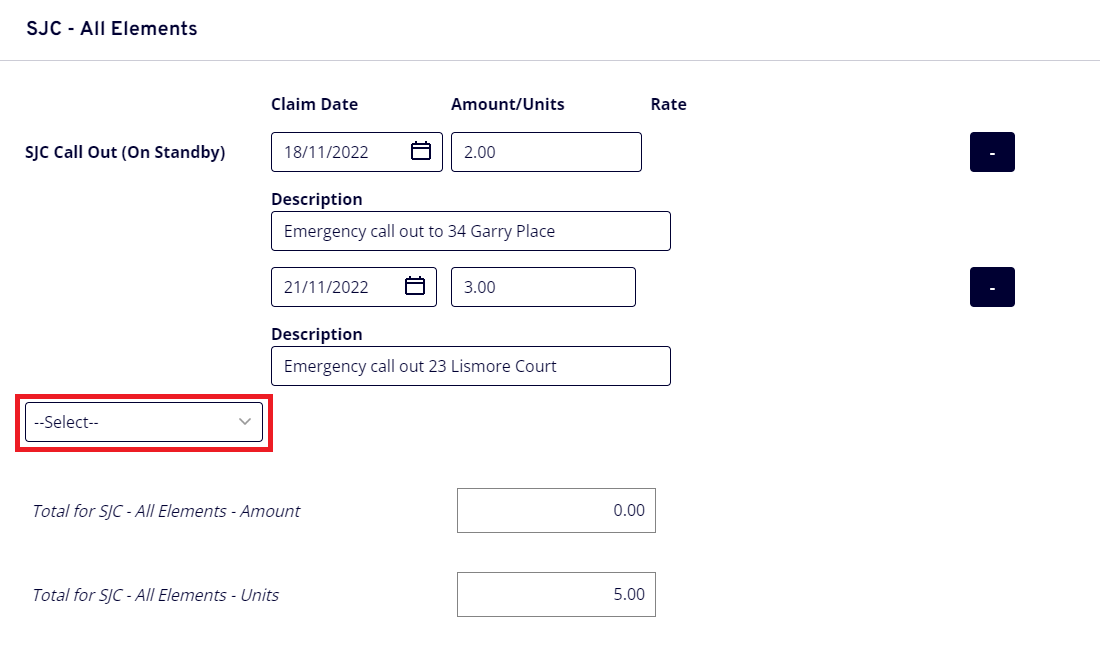
Units will automatically update, however the amount will be calculated once the authorised form goes into the system.
Click the blue minus button to delete an entry.

Please refer to the Saving and Submitting Claim Forms section for further instructions.
Editing/copying/deleting claim lines
There are several options available on each claim line which enable you to edit, copy or delete the line completely.

Withdrawing a submitted mileage/expenses claim
Click on My Claims, then My Mileage/Expenses History found in the left-hand navigation panel.
The form history page will be displayed.
Click on the form name under Description to open the relevant form you wish to withdraw.
Only forms with a Submitted status can be withdrawn. When a form has been authorised it can no longer be withdrawn.
Forms which have a status of Submitted can be easily identified as the status will appear in orange.
Click on Withdraw.
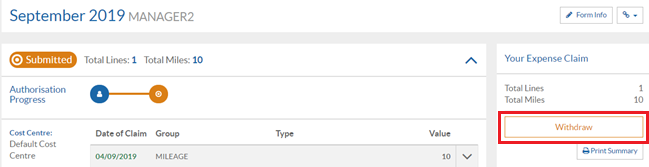
The status of the form will change from Submitted to Open.
The form can now be amended as necessary and submitted or saved for amendment at a later date.
Re-submitting a rejected claim
If your claim form is rejected you will receive an email notification.
If you log into MyView the rejected claim will appear in the My Mileage/Expenses History section.

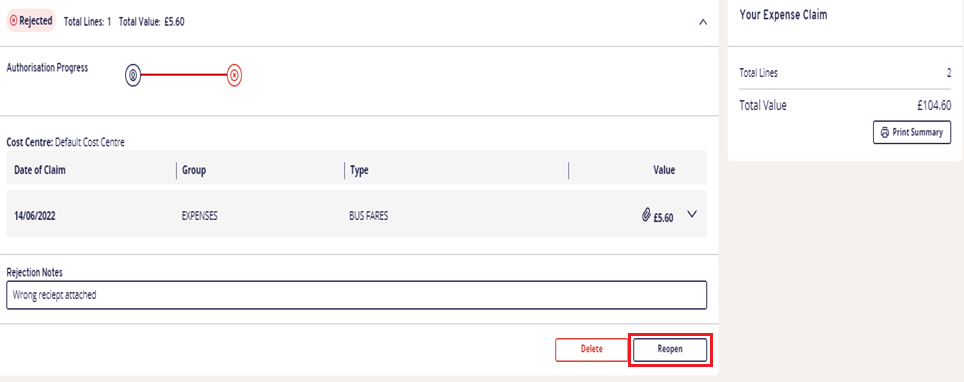
The claim will be easy to identify as it will have a status of Rejected.
Click on the form name under Description to open the rejected form.
The Rejection Notes field should have been completed by your manager to explain the reason for the rejection.
If you are unsure as to why the form has been rejected, speak to your manager.
To amend the form click on the Reopen button.
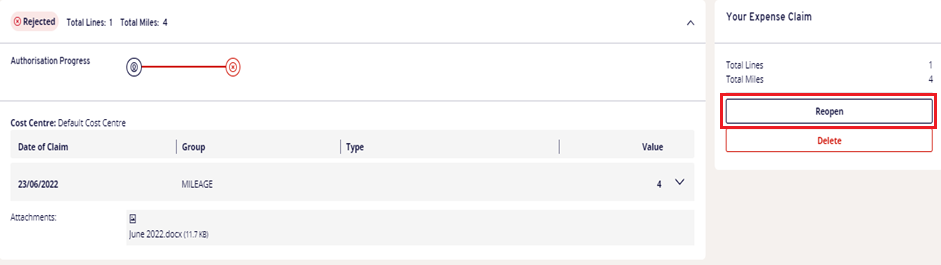
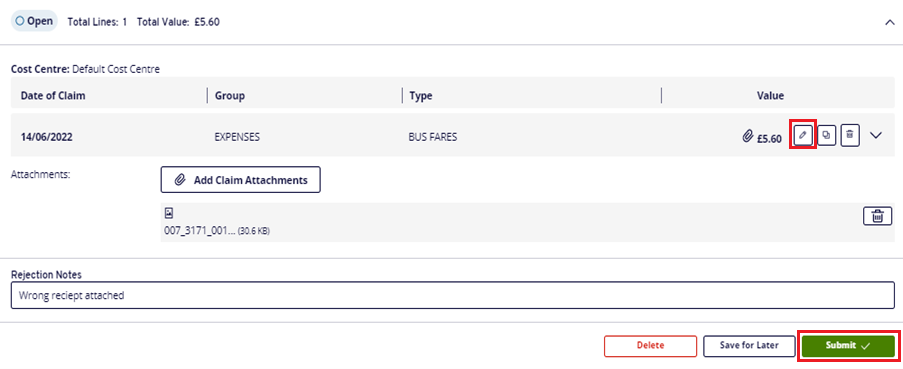
The claim form status will have changed from Rejected to Open.
The claim can now be amended as appropriate and saved for later or resubmitted.
If you do not wish to resubmit a rejected claim, you can use the Delete option instead to delete the claim form.
Partial claim authorisation
The expenses and mileage module allows managers to partially authorise a claim form rather than having to reject the whole claim if there is an issue with an individual line(s).

If a claim form has been partially authorised it will have a status of Mixed.
When a claim form has been partially authorised you will receive an email to say your claim has been rejected. The rejection notes mention that only part of the claim has been rejected. To check a partially authorised claim, click on My Claims, then My Mileage/Expenses History found in the left hand navigation panel.
The Form History page will be displayed.
Look for the claim which has the status Mixed.
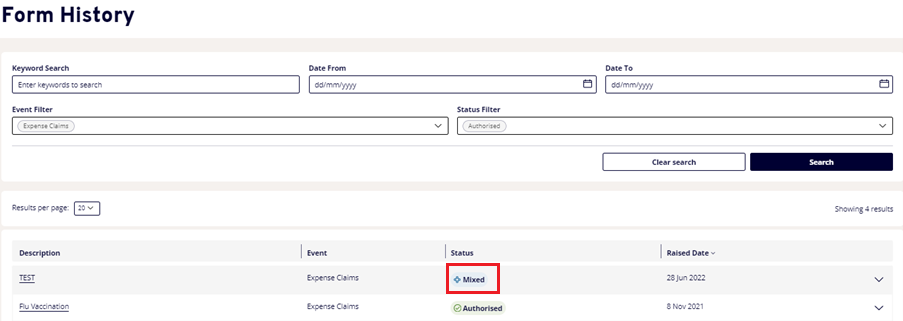
Click on the form name under Description to open the relevant form you wish to check/amend.
The claim form has now been split into 2 sections – rejected and authorised.
Any lines which have been rejected will appear at the top of the claim form. A rejection note should appear to indicate why the line has been rejected.
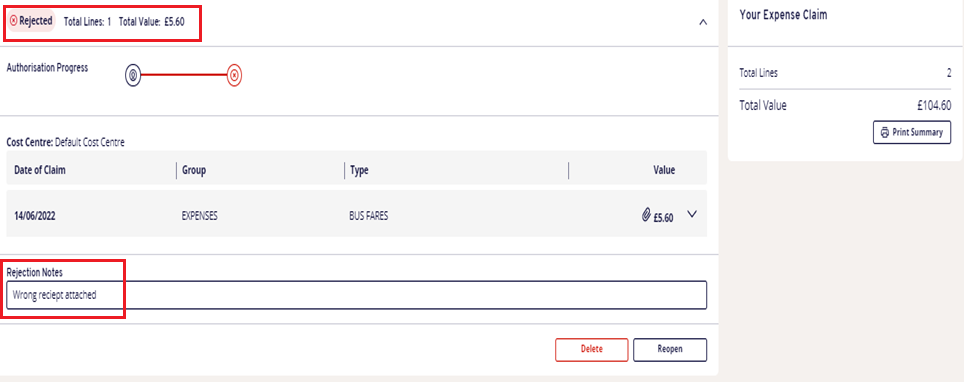
Under the rejected section click on Reopen.
The claim line can be amended as necessary using the Edit button.
When you are happy that the line has been amended accordingly click on Submit to resubmit the amended line.
The partial form will go back to the relevant manager for authorisation.
If you do not want to resubmit the rejected claim line you can use the delete option to delete the line completely.
Saving and submitting claim forms
When you complete a claim form for additional hours or overtime you will have the option to:
- Reset the form if you have made a mistake and would like to start again.
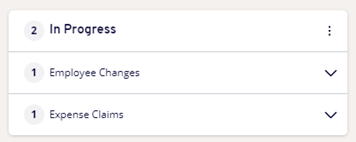
- Save for Later to save the form but not submit it. You can return to the form by accessing it in your In Progress widget on your dashboard homepage, you can then edit or add to the form before submitting. You may use this option if you would like to accumulate claims over a period of time eg accumulate over a month before then submitting.
- Submit if you have fully completed the form and do not wish to return to it. Once submitted this will then go to your manager for authorisation.
Please note that additional hours and overtime are referred to as Irregular Claims on the widget.
When submitting a claim form, please ensure it meets the criteria of Falkirk Council's financial regulations:
Claims for payment of salaries, wages, overtime, and other allowances, including travel and subsistence, must be submitted to the Payroll Section within the deadlines specified by the Chief Finance Officer from time to time. In addition:
- Claims must relate to a single pay period
- Claims for travel and subsistence and expenses must be submitted with appropriate receipts attached, including petrol VAT receipts
- In exceptional circumstances, claims submitted more than 2 months after the end of the calendar month to which the claim relates will only be paid if authorised by the Chief Officer, and accompanied by a memo from the Chief Officer outlining the reason for the delay.
Withdrawing, editing and re-submitting forms
When an additional hours, overtime or annual leave request form is rejected by your manager please follow the process below to re-submit:
Find and open the form within the rejected section within the relevant section, eg My Mileage/Expenses History/ My Additional Hours / Overtime or My Annual Leave Summary.
To access rejected additional hours / overtime claims:

Re-Open the form to move the form out of the Rejected section, to do this, click into the form then select re-open at the bottom (see below).
Find and open the form within the Open section within the relevant section (My Mileage/Expenses History/ My Additional Hours / Overtime or My Annual Leave Summary), eg below is an open annual leave request:

You can now make changes then re-submit your form using the submit button at the bottom of the form.
Withdrawing submitted forms to make changes and re-submit
If you wish to withdraw a form which has already been submitted, this can be found in the submitted section of the above screen.
Click on the form to open, you will then click on withdraw at the bottom right of the form, it will then sit within the withdrawn section. Click into the form and click re-open, it will then sit within the open section. You can then open the form, make changes then click submit.
Expenses & mileage claim FAQ's
Frequently asked questions regarding expenses and mileage claims can be viewed at: